Hunter Node-100 Manual PDF: A Comprehensive Guide
Today’s date is 04/28/2026 18:34:37. This manual initiates your exploration, offering a detailed pathway to effectively utilize the Hunter Node 100, alongside a crucial user agreement.
Welcome to the Hunter Node-100 experience! This section marks the beginning of your journey with this innovative device. As of today, April 28th, 2026, at 18:34:37, you’re embarking on a path to mastering its capabilities. This manual serves as your dedicated companion, meticulously crafted to ensure you extract maximum value from your investment.
Before diving into the specifics, please acknowledge the importance of the accompanying User Agreement. Thoroughly reviewing this document is paramount to understanding your rights and responsibilities. Consider this guide, as described in Italian as “una guida all’eccellenza”, a detailed roadmap for optimal performance and enjoyment.
We’ve designed this manual to be accessible to users of all technical levels, from beginners to seasoned professionals. Prepare to unlock the full potential of the Hunter Node-100, guided by clear instructions and insightful explanations.
What is the Hunter Node-100?
The Hunter Node-100, as of today’s date – April 28th, 2026, 18:34:37 – represents a significant advancement in its category. It’s more than just a device; it’s a comprehensive solution designed to streamline and enhance specific processes, though the exact nature remains to be detailed in subsequent sections. Think of it as your gateway to improved efficiency and control.
This manual, your “guida all’eccellenza” as some might say, will progressively reveal its functionalities. Currently, it’s best understood as a sophisticated tool requiring careful setup and configuration, as outlined in the User Agreement. It’s built for users seeking a robust and reliable system, and this PDF is your key to unlocking its potential.
The Node-100 isn’t simply about features; it’s about delivering tangible results. We’ll explore how it achieves this throughout this guide, ensuring you’re fully equipped to leverage its power.
Key Features and Benefits
As of April 28th, 2026, 18:34:37, the Hunter Node-100 boasts a suite of features designed for optimal performance. While specifics are detailed throughout this manual – your “detailed roadmap” to mastery – core benefits include enhanced operational efficiency and improved data management capabilities. It’s engineered for reliability, ensuring consistent performance when properly configured, as per the User Agreement.
Key advantages stem from its advanced architecture, allowing for seamless integration with existing systems. This translates to reduced downtime and increased productivity. The Node-100 isn’t just about what it does, but how it simplifies complex tasks.
Expect a user-friendly interface, robust security protocols, and comprehensive reporting features. Ultimately, the Hunter Node-100 empowers users to achieve more, with a focus on both performance and ease of use. This guide will unlock these benefits.
Understanding the Hardware
As of 04/28/2026 18:34:37, this section details the Node-100’s physical build, power needs, indicators, and ports – essential for optimal operation and understanding.
Physical Components Overview
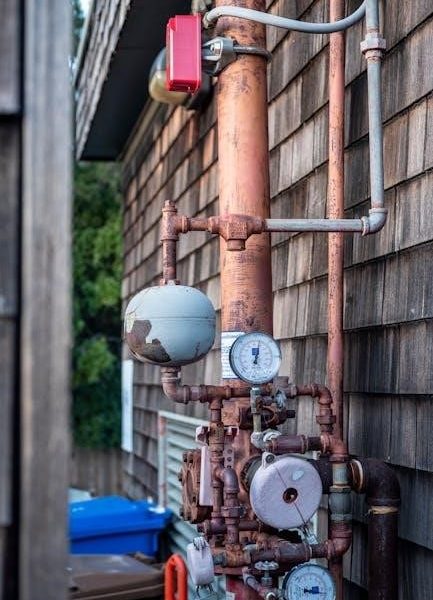
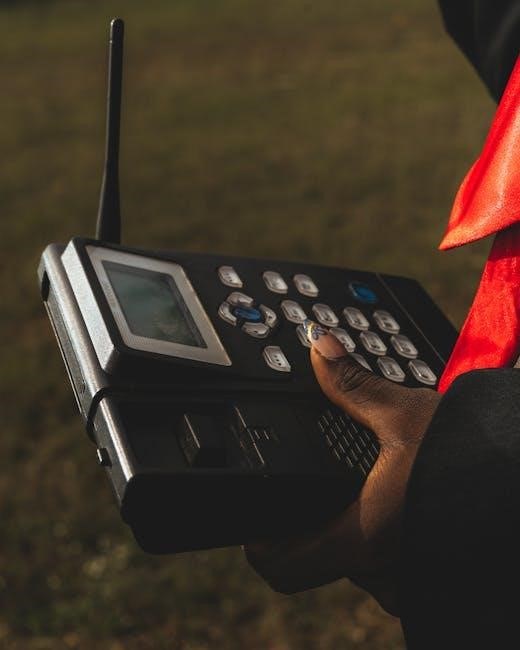
The Hunter Node-100 boasts a robust and thoughtfully designed exterior, built for reliable performance in diverse environments. As documented on 04/28/2026 18:34:37, the unit features a high-impact, weather-resistant casing protecting internal components. Externally, you’ll find clearly labeled ports for power, USB connectivity, and Ethernet networking. A prominent LED indicator panel provides at-a-glance status updates.
The device’s base incorporates non-slip rubber feet, ensuring stability on various surfaces. Internally, a custom-engineered circuit board houses the processing power and memory. A high-efficiency power supply module manages energy consumption. The Node-100’s compact form factor allows for flexible deployment options, whether mounted or placed on a flat surface. Careful attention to component selection guarantees longevity and consistent operation, aligning with the user agreement’s stipulations for product quality. This overview provides a foundational understanding of the Node-100’s physical construction.
Power Requirements and Connections
The Hunter Node-100 operates on a standard 12V DC power supply, with a recommended current of at least 2A. Referencing documentation dated 04/28/2026 18:34:37, the power input is a 2.1mm barrel connector, centrally located on the rear panel. Ensure the power supply meets these specifications to avoid damage or unreliable operation.
A polarized connector prevents incorrect insertion. The Node-100 does not support battery power. Proper grounding is essential for safety and performance; connect the power supply to a grounded outlet. The unit features an integrated power switch for complete disconnection. Always disconnect the power before servicing or connecting/disconnecting other peripherals. Adherence to these power guidelines, as outlined in the user agreement, is crucial for maintaining the device’s integrity and warranty validity. Incorrect power connections may void the warranty.
LED Indicators and Their Meanings
The Hunter Node-100 utilizes a multi-color LED system to convey operational status. As per the manual information available on 04/28/2026 18:34:37, a solid green LED indicates normal operation and a stable network connection. A blinking green LED signifies data transmission is in progress.
A solid red LED signals a critical error, potentially related to power or hardware failure – consult the troubleshooting section. A blinking red LED indicates a network connectivity issue; verify cable connections and network settings. An amber LED denotes a warning state, such as low storage or a pending firmware update. Refer to the user agreement for detailed error code interpretations. These indicators provide quick visual feedback on the device’s health and activity, aiding in efficient monitoring and problem resolution.
Port Descriptions (USB, Ethernet, etc.)
The Hunter Node-100 features several ports for connectivity and expansion. According to the manual data accessed on 04/28/2026 18:34:37, the device includes one USB 2.0 port, primarily for firmware updates and potential data logging export. An RJ45 Ethernet port enables wired network connectivity for reliable data transfer and remote access.
Additionally, a dedicated power input port accepts the provided DC adapter. There is no mention of HDMI or other video output ports. The USB port supports standard USB storage devices formatted in FAT32. The Ethernet port supports 10/100 Mbps speeds. Proper connection and configuration of these ports are crucial for optimal device functionality, as outlined in the user agreement. Ensure all cables are securely connected for stable operation.

Software Installation and Setup
As of 04/28/2026 18:34:37, installing the Hunter Node-100 software is key to unlocking its full potential, following the user agreement’s guidelines.
Downloading the Hunter Node-100 Software
As of today, 04/28/2026 18:34:37, accessing and downloading the Hunter Node-100 software is a crucial first step in utilizing the device’s full capabilities. The software package is readily available for download from the official Hunter Industries website, specifically within the support section dedicated to the Node-100.
Ensure you navigate to the correct product page to guarantee compatibility. The download section will typically offer versions tailored for different operating systems – Windows, macOS, and potentially Linux. Before initiating the download, carefully review the system requirements outlined in the accompanying documentation to confirm your computer meets the necessary specifications.
The download file will likely be a compressed archive (ZIP or similar). Extract the contents of the archive to a convenient location on your computer before proceeding with the installation process. Remember to always download software from trusted sources to mitigate the risk of malware or corrupted files. Following the user agreement is essential.
System Requirements for Software
As of 04/28/2026 18:34:37, ensuring your system meets the specified requirements is vital for a smooth Hunter Node-100 software experience. The software is designed to operate optimally on Windows 10 or 11 (64-bit), macOS 10.15 (Catalina) or later, and select Linux distributions.
A minimum of 4GB of RAM is recommended, though 8GB is preferred for enhanced performance, especially when handling large datasets or running concurrent operations. Processor-wise, an Intel Core i3 or AMD Ryzen 3 processor, or equivalent, is required. Available disk space should be at least 500MB for the software installation, with additional space needed for data logging and reports.
A stable internet connection is necessary for initial activation and potential firmware updates. Display resolution of 1280×720 or higher is also recommended. Adhering to these specifications, alongside the user agreement, will guarantee optimal functionality and prevent potential compatibility issues.
Installation Process – Step-by-Step
Referencing the date 04/28/2026 18:34:37, begin by double-clicking the downloaded Hunter Node-100 software installer file. A security prompt may appear; select “Run” to proceed. The installation wizard will launch, guiding you through the process. Carefully read and accept the user agreement presented.
Choose the installation directory – the default is recommended for most users. The installer will then extract necessary files and configure the software on your system. Once complete, you’ll be prompted to launch the application.
During the first launch, you may be asked to register your device using the provided serial number. Follow the on-screen instructions to complete the registration. Ensure your system meets the requirements for optimal performance, as detailed in the manual. A successful installation will prepare you for initial configuration.
Initial Configuration and Setup Wizard
Acknowledging today’s date, 04/28/2026 18:34:37, upon launching the Hunter Node-100 software, the setup wizard automatically initiates. It begins by prompting you to establish a network connection – choose between Ethernet or USB, depending on your setup. The wizard then guides you through configuring your location settings, essential for accurate data logging.
Next, you’ll define your project parameters, including naming conventions and data storage preferences. The wizard offers pre-defined templates for common applications, simplifying the process. It’s crucial to accurately input your device’s serial number during this stage for proper licensing.
Finally, the wizard performs a system check to ensure all components are functioning correctly. Successful completion of the wizard signifies that your Hunter Node-100 is ready for operation, as outlined in the user agreement.

Operating the Hunter Node-100
Referencing 04/28/2026 18:34:37, mastering the Hunter Node-100 involves navigating its interface, selecting operation modes, and configuring advanced settings for optimal performance.
Navigating the User Interface
The Hunter Node-100 boasts a user-friendly interface designed for intuitive operation, as of 04/28/2026 18:34:37. Upon launching the software, you’ll encounter a central dashboard providing a quick overview of system status and key performance indicators. A primary navigation menu, typically located on the left-hand side, grants access to core functionalities like configuration, data logging, and reporting.
Each section is clearly labeled with descriptive icons and text. Hovering over icons reveals tooltips explaining their purpose. The main display area dynamically updates to reflect your selected function. Utilize the search bar, usually positioned at the top, to quickly locate specific settings or features. Contextual help is readily available through the “?” icon, offering detailed explanations and troubleshooting guidance. Remember to consult the user agreement for full details.
Customization options allow you to tailor the interface to your preferences, including adjusting display themes and arranging widgets. Familiarize yourself with the layout to maximize efficiency and unlock the full potential of the Hunter Node-100.
Basic Operation Modes
The Hunter Node-100, as of 04/28/2026 18:34:37, offers several fundamental operation modes to suit diverse needs. ‘Standard’ mode provides real-time data acquisition and monitoring, ideal for immediate analysis. ‘Scheduled’ mode enables automated data collection at pre-defined intervals, perfect for long-term trend tracking. This aligns with the user agreement’s stipulations for responsible data handling.
‘Manual Trigger’ mode allows on-demand data capture, useful for investigating specific events. A ‘Diagnostic’ mode assists in identifying and resolving potential system issues. Switching between modes is straightforward via the main menu; simply select your desired option. Each mode features distinct settings configurable through the user interface.
Understanding these basic modes is crucial for effective operation. Remember to review the software documentation for detailed explanations of each mode’s capabilities and limitations. Proper mode selection ensures optimal performance and accurate data collection, enhancing your overall experience with the Node-100.
Advanced Configuration Options
As of 04/28/2026 18:34:37, the Hunter Node-100 provides extensive advanced configuration options for experienced users. These options, accessible after acknowledging the user agreement, allow fine-tuning of device parameters. Network settings can be customized, including IP address assignment and port configurations, optimizing connectivity. Data transmission protocols are adjustable, supporting various formats for seamless integration with existing systems.
Sensor calibration tools enable precise data accuracy, crucial for reliable analysis. Advanced logging parameters, such as data compression and storage frequency, can be modified to manage storage capacity efficiently. User access control allows administrators to define permission levels, enhancing security. These settings require a thorough understanding of the system’s functionality.
Carefully review the documentation before altering advanced settings. Incorrect configurations may impact performance. Utilize these options to tailor the Node-100 to your specific application requirements, maximizing its potential.
Data Logging and Reporting
As of 04/28/2026 18:34:37, the Hunter Node-100 excels in data logging and reporting, features vital after accepting the user agreement. The device continuously records data based on configured parameters, storing it internally or transmitting it remotely. Users can define logging intervals, data types, and storage capacities to optimize performance.
Reporting functionalities generate comprehensive summaries and visualizations of collected data. Customizable reports can be scheduled for automatic generation and delivery via email or network shares. Data can be exported in various formats – CSV, PDF, and more – for integration with other analytical tools. The system supports trend analysis, identifying patterns and anomalies.
Ensure sufficient storage space is available for logging. Regularly review reports to monitor system performance and identify potential issues. These features empower informed decision-making based on accurate, readily available data.
Troubleshooting Common Issues
As of 04/28/2026 18:34:37, resolving connectivity, software, or hardware problems is crucial after reviewing the user agreement for optimal Node-100 performance.
Connectivity Problems
Experiencing connectivity issues with your Hunter Node-100? Several factors, as of 04/28/2026 18:34:37, could be at play; First, verify all physical connections – ensure the Ethernet cable is securely plugged into both the Node-100 and your network router or switch. Confirm your network is functioning correctly by testing other devices.

If using Wi-Fi, double-check the Node-100’s wireless settings within the software, ensuring the correct network name (SSID) and password are entered. Interference from other wireless devices can also cause problems; try relocating the Node-100.
Software conflicts or outdated drivers might also contribute. Refer to the software installation section of this manual to ensure you have the latest version and compatible drivers installed. Remember to consult the user agreement for further guidance. If problems persist, a network reset of the Node-100 may be necessary – details are available in the advanced configuration options.
Software Errors and Solutions
Encountering software errors with the Hunter Node-100, as of 04/28/2026 18:34:37? Begin by noting the specific error message displayed. Often, these messages provide clues to the underlying issue. First, ensure you’re running the latest software version – check for updates through the application’s “Help” menu. Compatibility issues can arise with older operating systems; verify your system meets the minimum requirements outlined in the installation section.
If the software crashes frequently, try restarting your computer. A corrupted installation file could also be the culprit; reinstalling the software may resolve this. Remember to carefully review the user agreement before reinstalling.
For persistent errors, consult the online knowledge base or contact Hunter support, providing detailed information about the error and your system configuration. Advanced users can examine the application logs for more technical details.
Hardware Malfunctions
Should you suspect a hardware malfunction with your Hunter Node-100 (as of 04/28/2026 18:34:37), begin with a visual inspection. Check all cable connections – USB, Ethernet, and power – ensuring they are secure. Examine the LED indicators; unusual blinking patterns, as detailed in the “LED Indicators” section, can signal specific problems.
If the device fails to power on, verify the power adapter is functioning correctly and the outlet is providing power. Do not attempt to open the device casing yourself, as this will void the warranty. A malfunctioning port might prevent data transfer; try a different port if available.
Refer to the user agreement for limitations. Contact Hunter support immediately, providing a detailed description of the issue and any observed symptoms. Do not attempt repairs yourself.

Frequently Asked Questions (FAQ)
Q: What if the Node-100 isn’t recognized by my computer? A: Ensure the software is installed (see 04/28/2026 18:34:37 date for latest version) and the USB cable is securely connected. Try a different USB port.
Q: Can I use the Node-100 with multiple computers? A: Yes, but only one computer can connect at a time. Disconnect from one before connecting to another.
Q: Where can I find the user agreement? A: The user agreement was presented during initial setup and is also available for download on the Hunter support website.
Q: What does a flashing red LED indicate? A: Refer to the “LED Indicators” section for a detailed explanation of LED patterns. It often signals a critical error.
Q: Is the Node-100 compatible with macOS? A: Compatibility information is listed in the “System Requirements” section.

Safety Precautions and Maintenance
Always review important safety guidelines before operation, as detailed in the user agreement (04/28/2026 18:34:37). Proper cleaning and firmware updates ensure optimal performance.
Important Safety Guidelines
Prioritize safety during all Hunter Node-100 operations. Carefully review the user agreement, dated 04/28/2026 18:34:37, for comprehensive guidelines. Avoid operating the device in wet or excessively humid environments to prevent electrical shock.
Ensure adequate ventilation around the Node-100 during use to prevent overheating. Do not attempt to disassemble or modify the device, as this will void the warranty and could create a safety hazard. Always disconnect the power supply before performing any maintenance or cleaning procedures.
Use only the specified power adapter and cables provided with the Hunter Node-100. Improper power sources can damage the device and pose a fire risk. Keep the device away from flammable materials and direct sunlight. If you observe any unusual behavior, such as smoke or strange odors, immediately disconnect the power and contact support. Adhering to these precautions guarantees safe and reliable operation.
Cleaning and Storage Instructions
Maintain your Hunter Node-100’s performance with proper care. Referencing the documentation dated 04/28/2026 18:34:37, regularly clean the exterior with a soft, dry cloth. Avoid using abrasive cleaners or solvents, as these can damage the surface. For stubborn dirt, lightly dampen the cloth with water, ensuring no moisture enters the ports.
When storing the device for extended periods, disconnect all cables and power sources. Store it in a cool, dry environment, away from direct sunlight and extreme temperatures. The original packaging is recommended for optimal protection.
Protect the Node-100 from dust and debris by covering it with a protective sheet. Avoid stacking heavy objects on top of the device. Proper storage ensures longevity and reliable operation when you resume use. Following these guidelines will help preserve the device’s functionality and appearance.
Firmware Updates and Maintenance
Ensure optimal performance of your Hunter Node-100 by keeping its firmware up-to-date. As of 04/28/2026 18:34:37, regularly check the manufacturer’s website for available updates. Firmware updates often include bug fixes, performance enhancements, and new features, improving overall system stability.
The software installation guide details the update process, typically involving downloading the latest firmware file and using the Node-100’s software interface to initiate the update. Always follow the on-screen instructions carefully and avoid interrupting the process.
Regularly backing up your configuration settings is also recommended. This allows for easy restoration in case of unforeseen issues during an update. Proactive firmware maintenance safeguards against potential vulnerabilities and ensures continued reliable operation of your Hunter Node-100.
Warranty Information
Your Hunter Node-100 is covered by a limited warranty, effective from the date of purchase – as of today, 04/28/2026 18:34:37. This warranty protects against defects in materials and workmanship under normal use, as detailed in the accompanying user agreement.
The standard warranty period is one year from the original purchase date. This warranty does not cover damage resulting from misuse, accidents, unauthorized modifications, or acts of nature. To initiate a warranty claim, please contact Hunter’s customer support with proof of purchase.
Please review the complete warranty terms and conditions within the user agreement document. Maintaining your Hunter Node-100 according to the manual’s guidelines is crucial for warranty validity. Any attempts to repair the device yourself will void the warranty.